 Finally, the tomatoes are getting very, very close to ripening and being eaten! Well, the cherry tomatoes have been doing well for awhile now. I still haven't taken that off of the vine, waiting for it to get delicious and red. It's a 'big boy' tomato. I also have an heirloom variety, 'Pink Caspian.'
Thursday, August 21, 2008
But now for some happy and some lycopene
Finally, the tomatoes are getting very, very close to ripening and being eaten! Well, the cherry tomatoes have been doing well for awhile now. I still haven't taken that off of the vine, waiting for it to get delicious and red. It's a 'big boy' tomato. I also have an heirloom variety, 'Pink Caspian.'

Wednesday, August 20, 2008
Ack! What is happening to my vegetable garden?!?
 From the looks of this lovely crook-neck squash you'd think I'd be basking in an plentiful bounty o' veggies right now.
 But you would be wrong. "Why's that?" you ask. Because I have a visitor called verticillium wilt (at least that's what I believe it is...this site told me so). This visitor to my garden has decided to kill all of my cucumbers, squash and zucchini.
This is the end of the squash that still looks fine. But the stem and it's first major leaves are wilted and grey/yellow now.

Remember earlier this summer when I was so proud to have produced my first vegetable? The magic is gone and reality of a fungus has set in.
These are my three zucchini plants. The fungus got all of these as well.

These two pictures are a closer look at the stem close to the ground.
 Here's one plant that literally crumbled apart when I tried to take a closer look.
Does anyone have any suggestions? A few people have suggested crop rotation (plant non-vine-y things there) or solarize my raised bed next year...what would you do?
Monday, August 18, 2008
Do your part, you buffoon!
So I recently read a blog post asking people if they recycle, why they recycle and how they recycle.
Although I am a fairly new convert to the whole "green" movement and recycling and all of that know-your-carbon-footprint shenanigans, I am trying to do what I can and tell others to do it, too.
Here is a somewhat all-inclusive list of what I'm doing to --go green, go local, go whatever...
RECYCLE...okay people THIS IS NOT HARD (at least not in Indy).
Keep Indianapolis Beautiful (KIBI) has a fabulous webpage of where to take all of your recyclables including everything from bathtubs to old CDs (much more is recyclable than I ever thought, by the way). The easiest things to recycle are paper, plastics #1 and #2, glass and aluminum as most recycling locations take these and in some cities (Indy included) they will even do curbside pick-up.
Other items I physically take somewhere else to recycle:
Although I am a fairly new convert to the whole "green" movement and recycling and all of that know-your-carbon-footprint shenanigans, I am trying to do what I can and tell others to do it, too.
Here is a somewhat all-inclusive list of what I'm doing to --go green, go local, go whatever...
RECYCLE...okay people THIS IS NOT HARD (at least not in Indy).
Keep Indianapolis Beautiful (KIBI) has a fabulous webpage of where to take all of your recyclables including everything from bathtubs to old CDs (much more is recyclable than I ever thought, by the way). The easiest things to recycle are paper, plastics #1 and #2, glass and aluminum as most recycling locations take these and in some cities (Indy included) they will even do curbside pick-up.
Other items I physically take somewhere else to recycle:
- plastic bags (I'm trying with the canvas and fabric reusable ones and I do really well remembering to take them with me to the grocery, but always forget when I got to Target, Lowe's, etc) -- Sprawlmart and Kroger accept these (Kroger will also take plastic packaging and dry cleaning plastic
- cardboard --Republic Services has a location near 86th and Ditch that accepts cardboard. Almost everything comes in cardboard packaging--this can be recycled (or some can be put in the compost bin)
- Plastics #3-#7 -- this one is new. I just found a place downtown that accepts #3-#7 called Indianapolis Recycled Fiber so I'll be hauling it a trunkful at a time (gotta conserve gas!)down there. Almost all food containers (yogurt, dips, fruit, butter) seem to come in #5 so I was seeing a lot of that end up in my trash can.
COMPOSTING! So you all know about the compost tumbler and the compost pile. And we already know (from the To Compost or not to Compost post) that all yard and food waste (that is veggie and fruit) go into the compost pile.
Oh, and the newest helper for the compost pile: the compost bucket from World Market.
A W.I.P. (work in progress): the RAIN BARREL. The goal of the rain barrel is to collect rain water and save it for the times when you need to water the lawn. You can use water collected in the rain barrel--it's not treated like the water from the hose and, best of all, it's free!
And, of course, growing your own food is keeping it local, organic and tasty.
I buy as much as I can from Thrift Stores (like Goodwill!) and garage sales. The plan is to re-use or re-purpose it for my house. Granted sometimes this takes some imagination and crafty skill, but it is amazing what you can find. (That will be a future post...)
So, that is a good introduction to doing your part. Oh, and ride a bike instead of driving when you can.
Tuesday, August 5, 2008
My ReadyMade Proposal
This is my proposal for the ReadyMade Garden Challenge of 2008!
 I bit the bullet—I bought a house! I’ve been living in my new abode now for just over two months and I’m ready to embark on my first big project in the garden (while being thrifty, eco-friendly, and pocket-book conscious).

 The project centers on a fire pit and incorporates aspects that will encourage birds and pollinators to stop by and enjoy. I have a movable fire pit now---which has created many burn spots in my yard (oops). So I will create a “perma-pit” either with the one I already have or by building one into the ground.

 My plan includes reusing items I already have (such as pots and trellises) and items I hope to find for free or next to free (like the pile of bricks left here by the previous owners or the free wood chips that a local tree service will deliver).
I will have to buy some items such as a bird bath or fountain. A bird house will have to be made or purchased. And flowers must be purchased.
As you can see, there are some plants that already exist nearby, including some tall grass, Daylilies, Black-eyed Susan, and Evening Primrose. These will be thinned and additional native perennials that attract birds, bees and butterflies will be added. Ideally, I’ll incorporate flowers such as columbine, butterfly weed, false sunflower, purple coneflower, and other flowering perennials recommended by the Indiana native Plant and Wildflower Society (of course depends on what the local nursery has in stock).
Finally, not directly in the space, but just beyond it, I’ll be building a rain barrel that will catch rainwater from the down spout and allow me to water my new garden with free water. The barrel I already have for this project is a very industrial, bright blue. As is, this would stick out like a sore thumb in my yard. Therefore, I will repurpose some old wood, rope and scrap metal to cover the outrageous blue.
There is a huge amount to accomplish in one month; but, with the right tools, some really good friends to help, and some luck, I’ll have a fabulous haven for s’more making and bird bathing.
 I bit the bullet—I bought a house! I’ve been living in my new abode now for just over two months and I’m ready to embark on my first big project in the garden (while being thrifty, eco-friendly, and pocket-book conscious).
 The project centers on a fire pit and incorporates aspects that will encourage birds and pollinators to stop by and enjoy. I have a movable fire pit now---which has created many burn spots in my yard (oops). So I will create a “perma-pit” either with the one I already have or by building one into the ground.
 My plan includes reusing items I already have (such as pots and trellises) and items I hope to find for free or next to free (like the pile of bricks left here by the previous owners or the free wood chips that a local tree service will deliver).
I will have to buy some items such as a bird bath or fountain. A bird house will have to be made or purchased. And flowers must be purchased.
As you can see, there are some plants that already exist nearby, including some tall grass, Daylilies, Black-eyed Susan, and Evening Primrose. These will be thinned and additional native perennials that attract birds, bees and butterflies will be added. Ideally, I’ll incorporate flowers such as columbine, butterfly weed, false sunflower, purple coneflower, and other flowering perennials recommended by the Indiana native Plant and Wildflower Society (of course depends on what the local nursery has in stock).
Finally, not directly in the space, but just beyond it, I’ll be building a rain barrel that will catch rainwater from the down spout and allow me to water my new garden with free water. The barrel I already have for this project is a very industrial, bright blue. As is, this would stick out like a sore thumb in my yard. Therefore, I will repurpose some old wood, rope and scrap metal to cover the outrageous blue.
There is a huge amount to accomplish in one month; but, with the right tools, some really good friends to help, and some luck, I’ll have a fabulous haven for s’more making and bird bathing.
Wednesday, July 30, 2008
DIY: No-sew new-to-me chair (for the garden room, of course!)
Here is the before pic--a hideous, I'm thinking 70's chair with lime green velvet and a funk that made the birds fly away. I think this is the one that had a mouse living in it at some point.
Why do I own it? Because I saw fabulous "bones" and a fabulous price ($7.99 at Goodwill). It shall be re-claimed for my garden room, where I am attempting to bring the outside in.
PROJECT TIME!
Tools and materials you'll need:
- needle nose pliers
- something with a flat edge for removing staples (I use a flat head screw driver)
- gloves (these things are just dirty)
- hand sander
- spray paint
- 2 yards of fabric (the pretty kind)
- 2 feet of muslin or plain fabric
- 2 feet of quilt batting
- 2" foam (for the cushion)
- staple gun (and staples)
- clear glue (I used Welder in the red tube) -- NOT hot glue
- embellishments, cording, etc
Steps:

1. Strip off all of the fabric, staples, glue, foam, padding, etc. This is what mine looked like when I was all done.
2. Take your pick--strip, sand and stain OR sand and paint. I chose the later because I wanted a lighter finish than the wood. Plus, I wouldn't know how to care for the caning properly to stain. I used 1.5 cans of spray paint on this one chair to get good and even coverage.
This stuff was the easy part. I'd done all of these things before. Now I was embarking to new territory--re-upholstery!
3. Making the seat.
First I put a layer of muslin over the squiggly metal pieces and trimmed my 2" foam to fit into the seat. Next I covered the foam with a layer of batting and now it was time for my fabric (sorry I didn't take pictures of these steps!)
Staple the fabric in the middle of the front of the chair, pull firmly and staple the opposite side in the middle. Make sure you have a couple of inches overhang. Work slowly to the sides. On this chair I was lucky enough to have a indentation where I put the staples. The most frustrating part of this entire project was making sure the fabric lies flat and still looks nice. On the corners I made a fold so the fabric didn't bunch.
I then took an Exacto knife and cut off the excess fabric. I finished it with some golden braid, which fit perfectly into the indentation. I used the clear glue to adhere it to the chair.

As for the top I re-used the cardboard insert and the brads from the old chair. I re-covered the brads using a different fabric and I adhered this using Aileen's craft glue. I then took fabric and covered the cardboard insert (again with the clear glue)
Once it was re-covered, I attached it to the chair using the Welder glue.
Voila! The finished product! A vast improvement for the eyes and for the nose.
Thursday, July 24, 2008
Oh, oh it's magic!
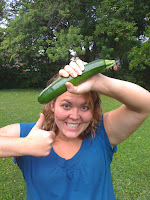 Da-dah!
 It's the first "fruit" of my labor. The first zucchini has come off of the plant and is ready to be eaten.
I call this magic, because just a few months ago I was putting the seeds in a peat pot. He was planted in early June, so I think we would have had some earlier had I put him in the ground earlier. Moving prevented that.
This guy is about 10 inches long--on Monday he was only 4 or 5. I think the water from the storms really helped. There are about 4 more currently growing getting ready to be devoured.
With the first zucchini comes my first zucchini recipe:
***While you have an abundance of zucchini now, they are hard to come by or expensive in the winter. Grate zucchini, measure the right amount and store in freezer bags. Then you'll have the necessary ingredients for this tasty treat year round.
Zucchini Bread (I loved making this with Mom when I was a kid)
Ingredients
3 cups all-purpose flour
1 teaspoon salt
1 teaspoon baking soda
1 teaspoon baking powder
3 teaspoons ground cinnamon
3 eggs
1 cup vegetable oil
2 1/4 cups white sugar
3 teaspoons vanilla extract (the expensive stuff is well worth it!)
2 cups grated zucchini
1 cup chopped walnuts (some people think the walnuts are optional, I think these people are crazy)
Directions
Grease and flour two 8 x 4 inch loaf pans. Preheat oven to 325 degrees F.
Sift flour, salt, baking powder, soda, and cinnamon together in a bowl.
Beat eggs, oil, vanilla, and sugar together in a large bowl. Add sifted ingredients to the creamed mixture, and beat well. Stir in zucchini and nuts until well combined. Pour batter into prepared pans.
Bake for 40 to 60 minutes, or until tester inserted in the center comes out clean. Cool in pan on rack for 20 minutes. Remove bread from pan, and completely cool.
**Can be stored in the refrigerator for a few weeks or frozen for months.
YUM!
Tuesday, July 15, 2008
July Bloom Day!

Firstly, it's important to welcome a new friend at In the Weeds. Freddie is our resident flamingo. He comes to us by way of the local JoAnn's fabrics and I think he's just fabulous.
 Phlox in many colors all over the back of the house. Light purple, bright purple, and white are blooming now.
 Coneflower--so pretty and it makes the bees happy.
 Gaillardia 'Arizona Sun' -- this is the first flower I personally planted at the new house. I think it's taken a liking to it's new home.
 Daylilies are everywhere! Most of them are this double, orange variety. But I have a few beautiful creamy pink ones.
 Finally, shasta daisies hidden amongst the coneflowers and others (read: weeds) in the side yard.
All of the veggies (except the peppers) are blooming: tomatoes, cucumbers, squash and zucchini. There are still a few rose buds, salvia, and geranuims.
The black-eyed susans are budding. They are going to be spectacular!
Subscribe to:
Posts (Atom)


